Run a workshop with tuning, repairs and servicing
JG Mechanic Script combines vehicle customisation with mechanic work orders, repairs and servicing. Players can use configured self-service locations or place work with a mechanic business. QBCore, Qbox and ESX integrations are documented by the creator; the inventory, jobs and banking setup still needs to match your server.
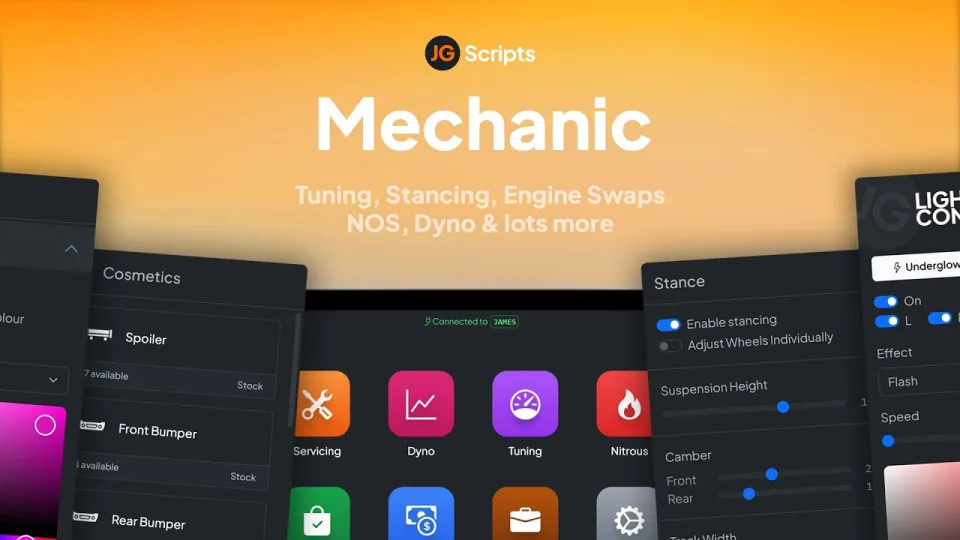
The preview gallery contains the product showcase. Use it to assess the interface and visual effects, then review the installation and business-setup requirements before choosing the resource.
Workshop features
- Tuning and appearance: vehicle modifications, supported DLC options, automatic camera angles and a free camera for previews. Available modifications depend on the vehicle model and game build.
- Respray and lighting: colour search, RGB and supported chameleon finishes, plus LightingControl+ xenon and underglow effects.
- Stance and performance: per-wheel stance adjustments, engine, tyre and brake tuning, manual-transmission swaps and a dyno interface.
- Repairs and servicing: mileage-based wear, repair kits and configured workshop repairs. Pricing can be adjusted to your economy and vehicle values.
- Business tools: tuning and servicing invoices, item-based interactions, configurable job-locked car lifts and Discord logging.
- Multiplayer presentation: the listed effects and animations use OneSync Infinity state bags for synchronisation.
An addon vehicle needs suitable model and modification data for its relevant tuning options. This resource cannot add a missing mod kit to a vehicle model.
What to prepare before installation
Back up the existing resource configuration, inventory-item definitions and relevant vehicle data. On staging, record your framework, inventory, banking, boss-menu, fuel and garage resources and their versions. This gives you a specific integration checklist and a repeatable starting point if an update changes behaviour.
The creator's installation guide names four resource folders: jg-mechanic, jg-mechanic-props, jg-vehiclemileage and jg-textui. The text UI resource is optional when another supported text UI is configured. Check the folders in your downloaded release before following a guide for a newer version.
Installation sequence
- Add the resource folders. Place the supplied JG resources together, preserving their names. The creator's guide uses a
[jg]resource group. - Set the start order. Start your framework, inventory and other selected integrations first. The guide then starts the JG group with
ensure [jg]. - Register inventory items. Follow the instructions for your inventory under
install/inventory; the supplied item images are in itsimagesfolder. Check item identifiers against the configured requirements. - Review configuration. Use
config/config.luafor integrations, mechanic locations and core options. Review the additional pricing, servicing and tuning configuration files before changing the economy. - Configure each owned business. Assign its job, grades, locations and access rules. Check that lift and interaction positions fit the workshop map you actually stream.
- Set up banking and management. When
Config.UseFrameworkJobs = true, use your framework's boss menu or a compatible alternative. Create the society account for every unique mechanic job in your banking resource before taking work orders. JG Mechanic does not create those third-party bank accounts. - Restart and test one workshop. Finish the checks below before duplicating the configuration for more businesses.
See the JG Mechanic installation guide, which also links the creator's inventory, job-setup and video installation guidance.
Test the complete work order
Use one customer and one mechanic character on staging. Confirm that the customer can preview an available modification, receive the expected price, place an order and pay through the configured account. Confirm that the mechanic can use the required items and apply the work.
Then store the vehicle in your garage, reconnect and retrieve it. Check the modifications and servicing state that your configured integrations are intended to preserve. Also test an unauthorised character at the workshop and a vehicle without the relevant modification options.
- A tablet, tool or part cannot be used: Item registration, item identifiers and the selected inventory integration.
- Work orders cannot charge the business correctly: Mechanic job name, society account and banking integration.
- Management is missing: Whether framework jobs are enabled and employee management belongs in an external boss menu.
- Changes disappear after garage retrieval: Shared plate/owner identifiers, vehicle-property persistence and the garage integration.
- A tuning option is absent: Vehicle mod-kit support, configured options and game build.
Record the exact action and client/server error before changing another integration. These are acceptance checks to run on your server, rather than a claim that every combination of resources has been tested.
Plan storage and a workshop location
Compare JG Advanced Garages v3 when deciding how repaired and modified vehicles will be stored. The JG Scripts collection explains the roles of garages, mechanics and dealerships.
For a physical workshop, browse the FiveM mechanic shop collection, which includes location assets and related vehicle resources. A workshop interior supplies the space; jobs, permissions, work orders and interaction positions come from the scripts you configure.
JG Mechanic Script compatibility and purchase details
Write a review
Reviews are moderated before appearing. Purchased the product? Your review gets a VERIFIED badge automatically.